How to create and edit Menus in Wordpress
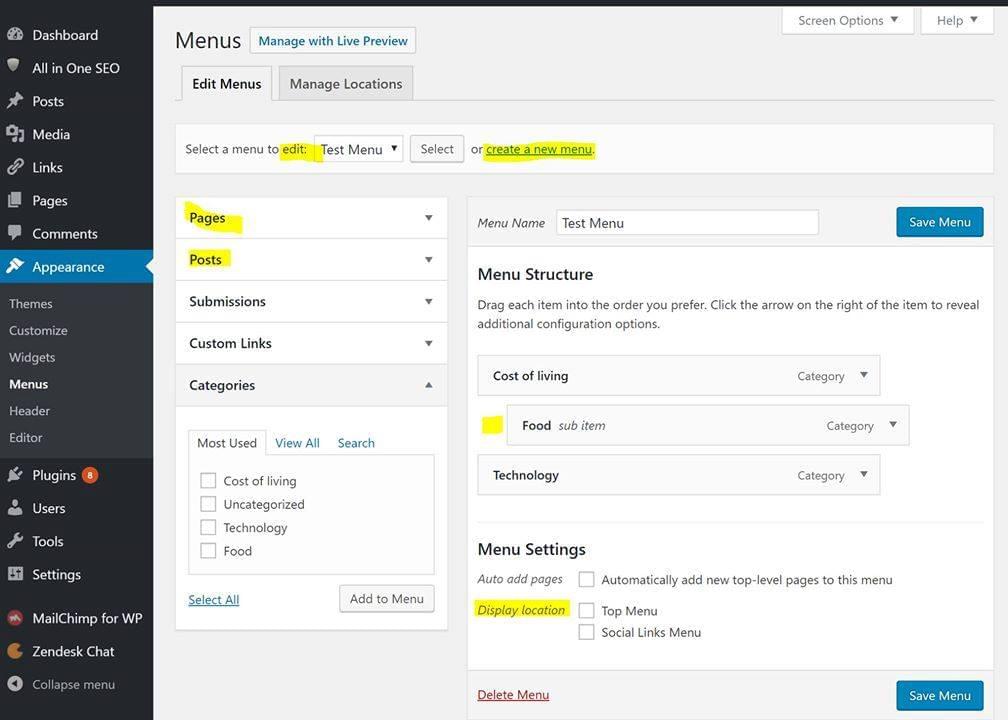
Jun 30, 2020 · 1 min readTo edit a menu login to your wp-admin and go to Appearance > Menus. If there is no menu yet you can create a new menu. On the left side of the screen you can switch between adding Pages, Posts, Custom Links or Categories to your Menu.

Your theme might have one or more Display Locations for Menus, for example a Main menu and a Footer menu.
Use your mouse to drag & drop items into the order you want. You may also set items to be a submenu, like I did with the Food category in the screenshot above, by dragging it to the right with the mouse.
Adding a Home option to your menu
If you want to make a link to your home page, choose Custom Links on the left side of the screen and add a custom link to your-web-site.com to the menu and call it Home.
Edit a menu option
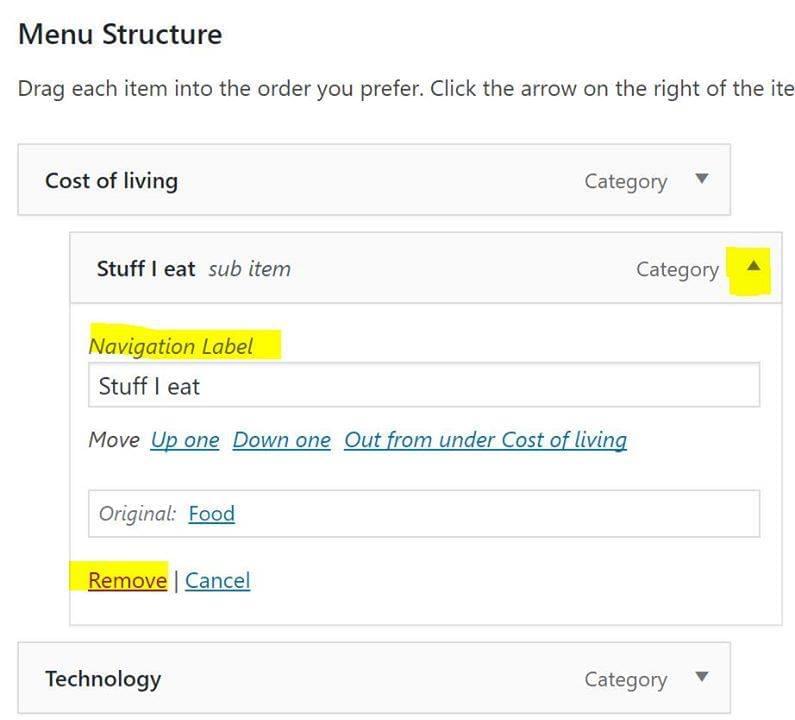
You can click the little triangle icon on the right side of the menu item to fold it open and see its options. There you can change the name or remove the item from the menu.

Display Location
Once the menu is ready and saved you can assign it to a Display Location with the checkbox under Menu Settings. You can also assign your menus to Display Locations via the Manage Locations tab on the top of the screen.
Besides the Display locations that you see under the Appearance > Menus settings you can also go to Appearance > Widgets and drag a “Navigation menu” widget into a widget area such as a sidebar or footer widget, and assign a menu to that Navigation menu. The widget areas that are available depend on your theme.
After you switch to another theme you usually need to assign your menus again to the Display locations of that theme.
